
We Got Chicks!!
Our family loves eggs. No, really—we really love eggs.
We eat them every single day and easily go through at least two dozen a week… usually more. At some point, it just started to feel like we should have a more direct relationship with our breakfast. So after years of talking about it, we finally did the thing:
We got chicks!!!
It’s only been a week, but wow—what an adventure. Equal parts adorable, chaotic, fascinating… and yes, a little emotional.
Now, this wasn’t a “Sunday night idea, Monday morning chickens” situation. We’ve been researching and prepping for quite a while. There are tons of amazing resources out there (and a huge thank you to my friends Martin and Pete, who have been absolute lifesavers through this process), but I struggled to find advice tailored to raising chickens in a suburban setting—where space is tighter, rules can be stricter, and your neighbors may or may not be thrilled about your backyard farm dreams.
So, I figured I’d share our journey in case it helps another aspiring suburban chicken-keeper feel a little more confident. Here’s how we did it:
Step 1: Check Your Town Rules
Before anything else, we made sure we were actually allowed to have chickens.
Our borough website had a section on poultry permits, where we learned:
Coops must be set back 10 feet from property lines
No roosters (sorry, early morning wake-up calls)
Maximum of six chickens
A zoning permit is required
Every town is different, so definitely check your local rules first. Nothing kills the chicken dream faster than a zoning violation.
Step 2: Talk to Your Neighbors
Next up: the neighbors.
We’re lucky to have amazing ones, so we reached out, gave them a heads-up, and (very strategically) promised them fresh eggs. That seemed to help. Bonus: one neighbor used to raise hundreds of ducks as a kid and had tons of great advice to share. Safe to say, we got the green light all around.
Step 3: Build the Coop
Instead of starting from scratch, we repurposed our kids’ old swingset (which they’ve officially outgrown) into a coop and chicken run. Honestly, this might be my favorite part of the whole project. A few key things we kept in mind:
Nesting Boxes
We built three 12×12 boxes with a small lip to keep eggs from rolling out. They’re accessible from outside the coop—which future us will be very grateful for during egg collection. We are also lining our nesting boxes with these liners.
Roosting Bars
Using 2x4s, we installed two bars at different heights, about 2 feet off the ground and higher than the nesting boxes.
Chicken Run
We made sure each chicken would have about 4 square feet of space and secured the run with hardware cloth, including digging down about a foot to keep predators out.
Still Figuring Out…
We’re not done tweaking things. Once the chicks are ready to move outside (around 6–8 weeks), we’re planning:
Sealing the wood - the swingset is made of cedar and we learned after the fact that cedar causes respiratory issues in chickens so we are working through how to properly seal it.
Rubber stall mats + pine shavings for easier cleaning
Some winter-proofing (maybe shutters)
Entertainment (yes, bored chickens are apparently a thing)
A dust bath area
More to come on that as we learn! See before and after pictures below!
Step 4: Prep Your Kids (If You Have Them)
Our kids (9 and 11) were beyond excited—which is great, but also… expectations needed to be managed.
We talked about:
How fragile chicks are
The reality that not all may survive
Their responsibilities in caring for them
Safe handling (no, they will not be free-roaming the house… nice try)
I’m really glad we had these conversations upfront because we did have a sad moment early on (more below!).
Step 5: Order (or Buy) Your Chicks
We ordered from Meyer Hatchery because I had my heart set on specific breeds—friendly, kid-safe, good egg layers, and ideally producing those gorgeous blue/green eggs.
Lesson learned: order early. Like, months early.
By the time I ordered, most breeds were sold out everywhere. We ended up with:
3 Easter Eggers
3 Golden Buffs
They arrived safely (and were ridiculously cute), but unfortunately, we lost one the first night. It was really sad—but again, I’m thankful we had prepared the kids for that possibility. In a slight “well, that escalated quickly” moment, I went to Tractor Supply to get another chick… and learned there’s a 4-chick minimum. So naturally, I came home with four more chicks. We now have nine. As one does who is only allowed to have six.
If you are looking for some breed recommendations, below are the breeds that were originally on my list. If you want to do your own research, The Backyard Chicken Keeper’s Bible has been an amazing resource! It has pictures of all the chicken breeds and gives a really detailed description of each. It’s my favorite chicken book so far.
Buff Orpington, Golden Buff, Australorp, Wyandotte, Plymouth Rock, Cream Legbars, Marans, Easter Eggers, Rhode Island Reds
Step 6: Set Up the Brooder
Before bringing chicks home, have your brooder completely ready. We set ours up in a bathroom (yes, the kids lost their bathroom privileges temporarily), mainly because:
Temperature is more stable than a garage or basement
Easy access to water
Easy to check on them constantly (which we are all absolutely doing)
We used a pack n’ play as our brooder—lined with cardboard, puppy pads, and pine shavings—and added:
Heat plate (safer than a heat lamp)
Food + multiple water containers
A perch and a mirror (they are obsessed with the mirror)
Below are links to everything we purchased for our brooder set-up:
Heat Plate: ZenxyHoc Brooder Heat Plate with Anti-Roost Cone (You want one with a cone so they don’t poop all over the top of it!)
Thermometer - Tempro Indoor Thermometer (you need a thermometer that lays flat for under the brooder plate so you can monitor the temperature)
Feed Containers, Water Containers, Perch (2 Sizes) - Pawaboo 7 in 1 Chick Brooder Box Starter Kit
Extra Water Containers - 2 pack 1.5L Chick Waterer (These are way better than the ones that come with the 7 in 1 starter kit):
Puppy Pads - Amazon Basics Leak-Proof Pupp Training Pads (Note: I bought a ton of these thinking I would use them throughout the time the chicks are in the pack n play, but I don’t think we will use them after week one - two. The chicks are already starting to dig and peck and I’m worried they will ingest the puppy pad.
Pine Chips - Pin Small Pet Bedding 141L
Starter Feed: Manna Pro Medicated Starter Feed
Chick Grit - Manna Pro Chick Grit
Step 7: Caring for the Chicks
Not going to lie—I barely slept the first few nights. It felt like having newborns again. A few things I’ve learned already:
Dip their beaks in water when they arrive so they know where it is
Keep temps around 90–95°F the first week
Elevate water to keep it (somewhat) clean
Change water constantly (they are messy!)
Clean bedding frequently—they eat a lot, which means… you guessed it
Wash hands before/after handling
Also, chicks don’t see well in the dark, so we kept some light on at first so they could find their way around.
And that’s where we are so far!
I’ll keep updating as we go, but hopefully this helps anyone thinking about raising chickens in a suburban setting. It’s been a learning curve already—but such a fun and rewarding one.
And a big thank you again to Martin and Pete for all their help and guidance—we definitely couldn’t have done this without you.
Note: Some links may be affiliate links. I only recommend products we actually use and love.
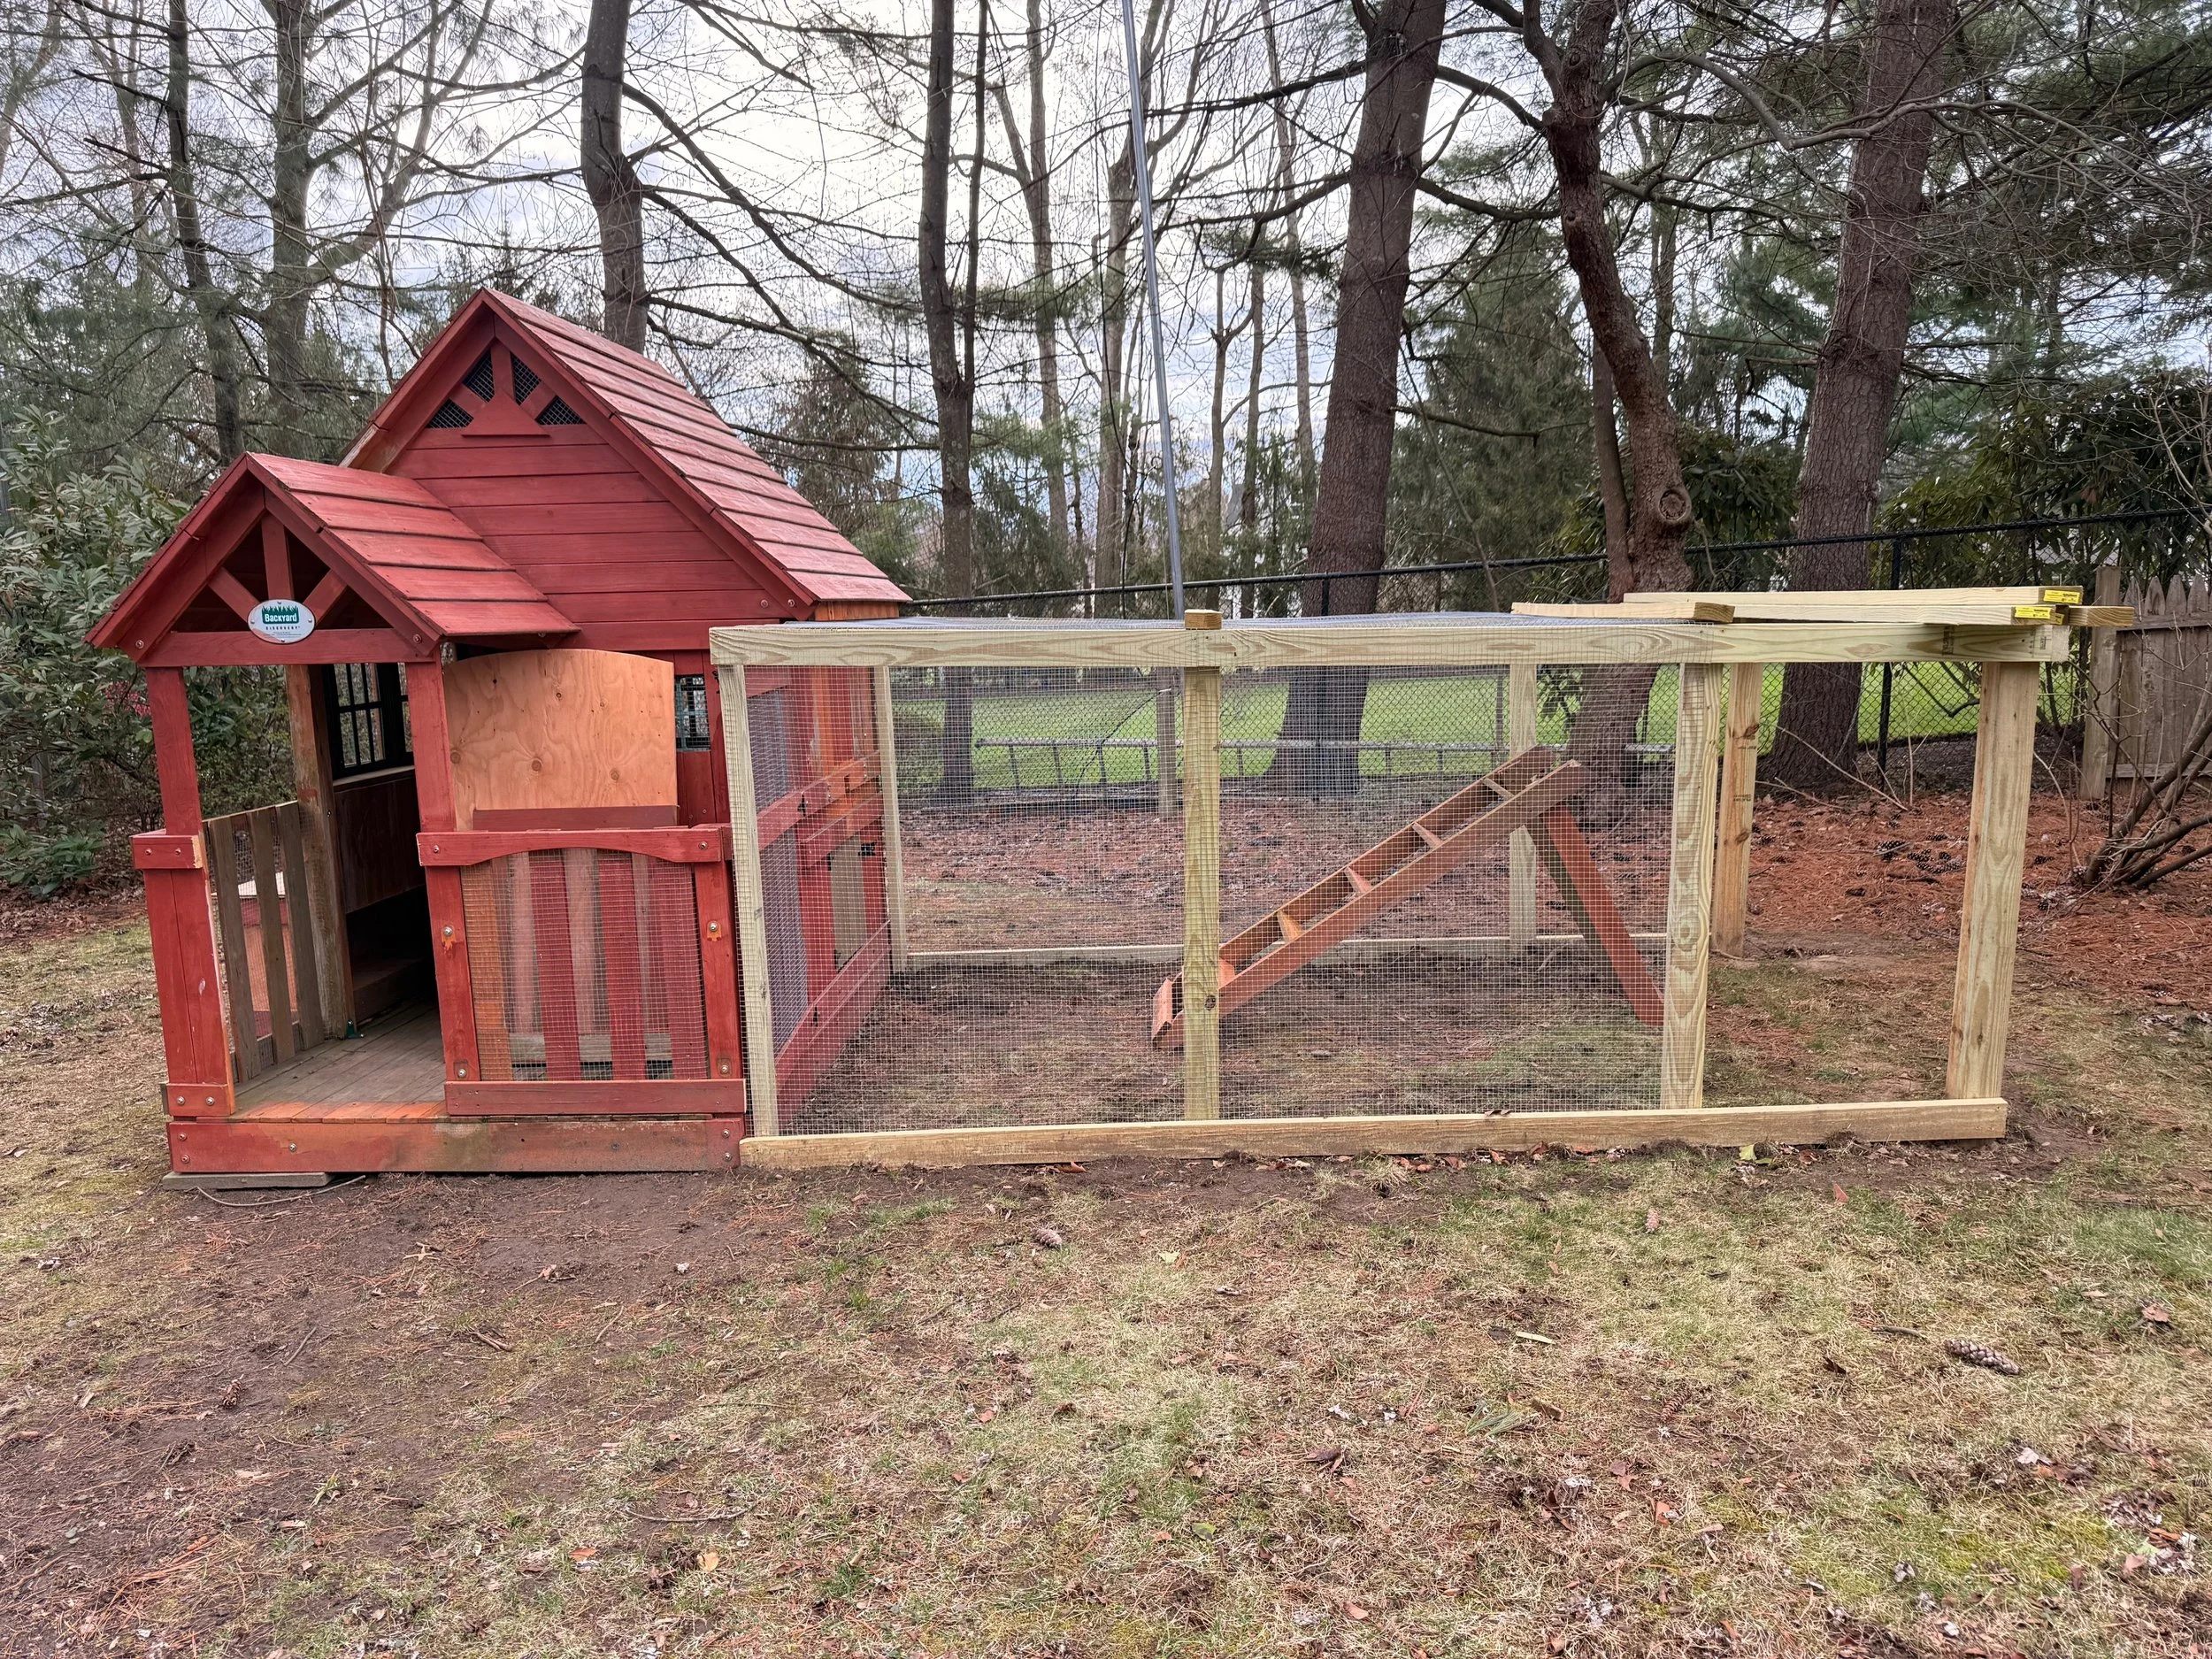
Our work-in-progress chicken coop made from our daughter’s swingset that they have outgrown.
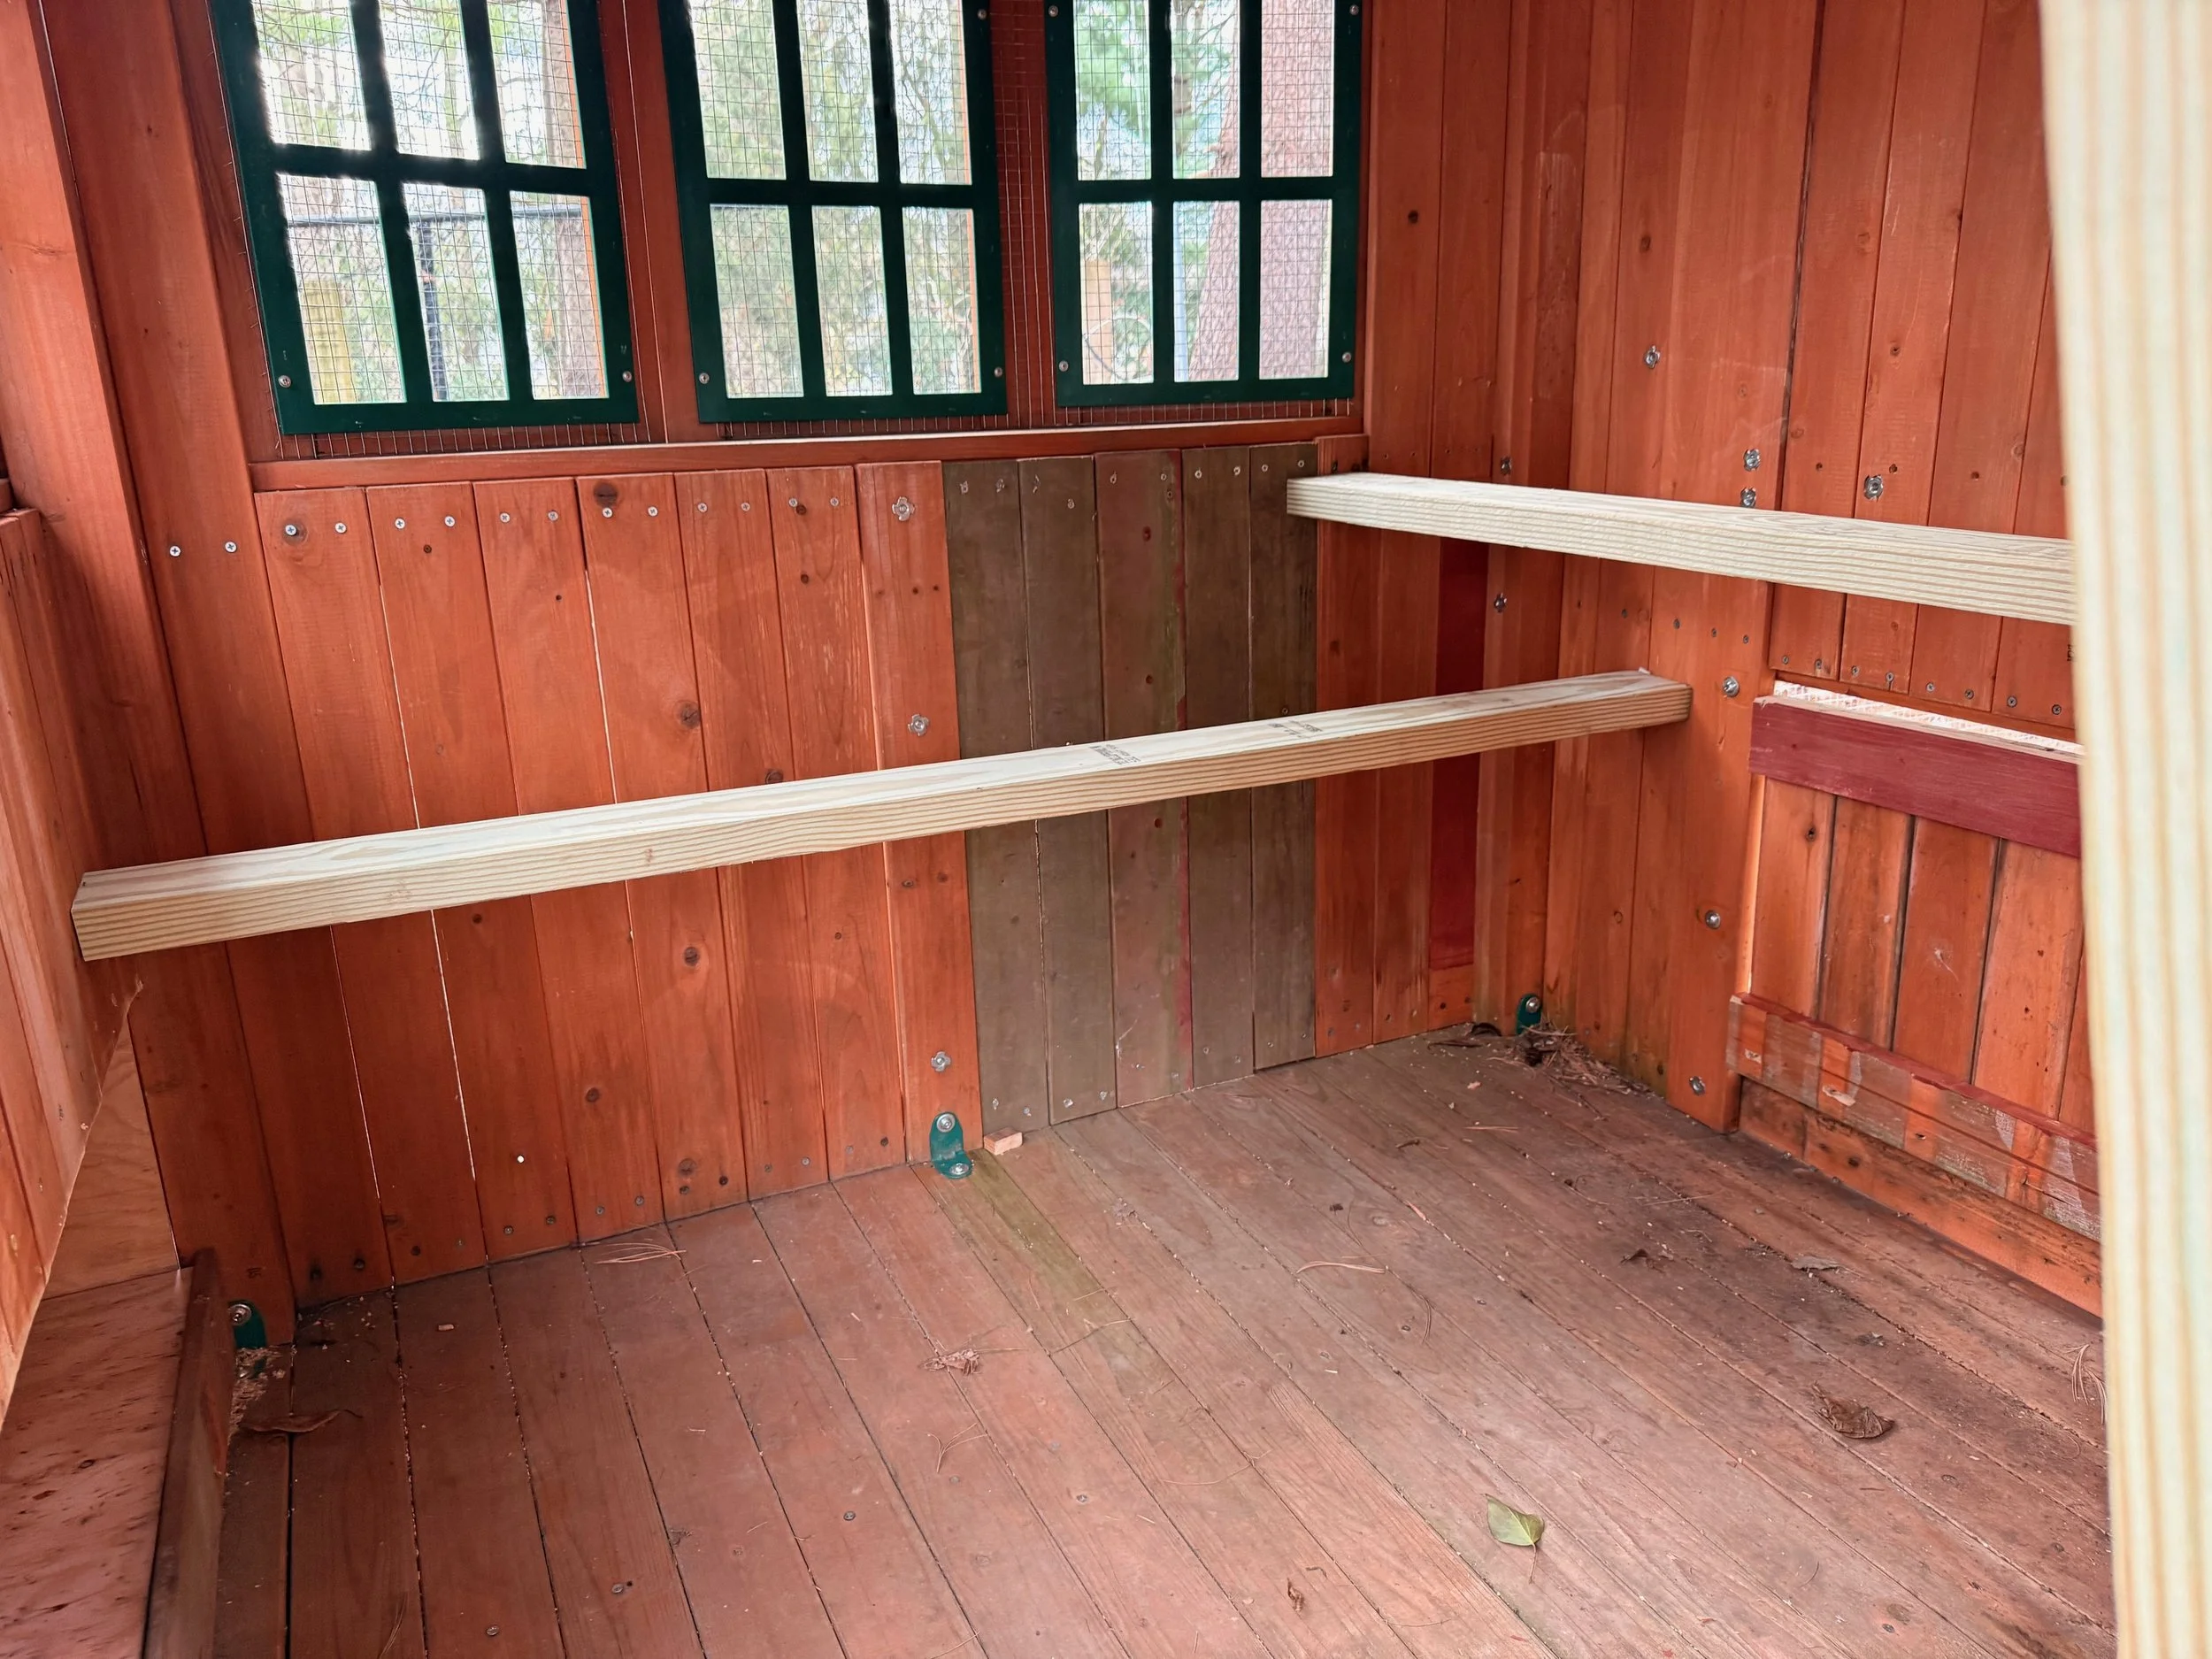
Interior of the coop

Nesting box built into the side of the coop with exterior accessibility.
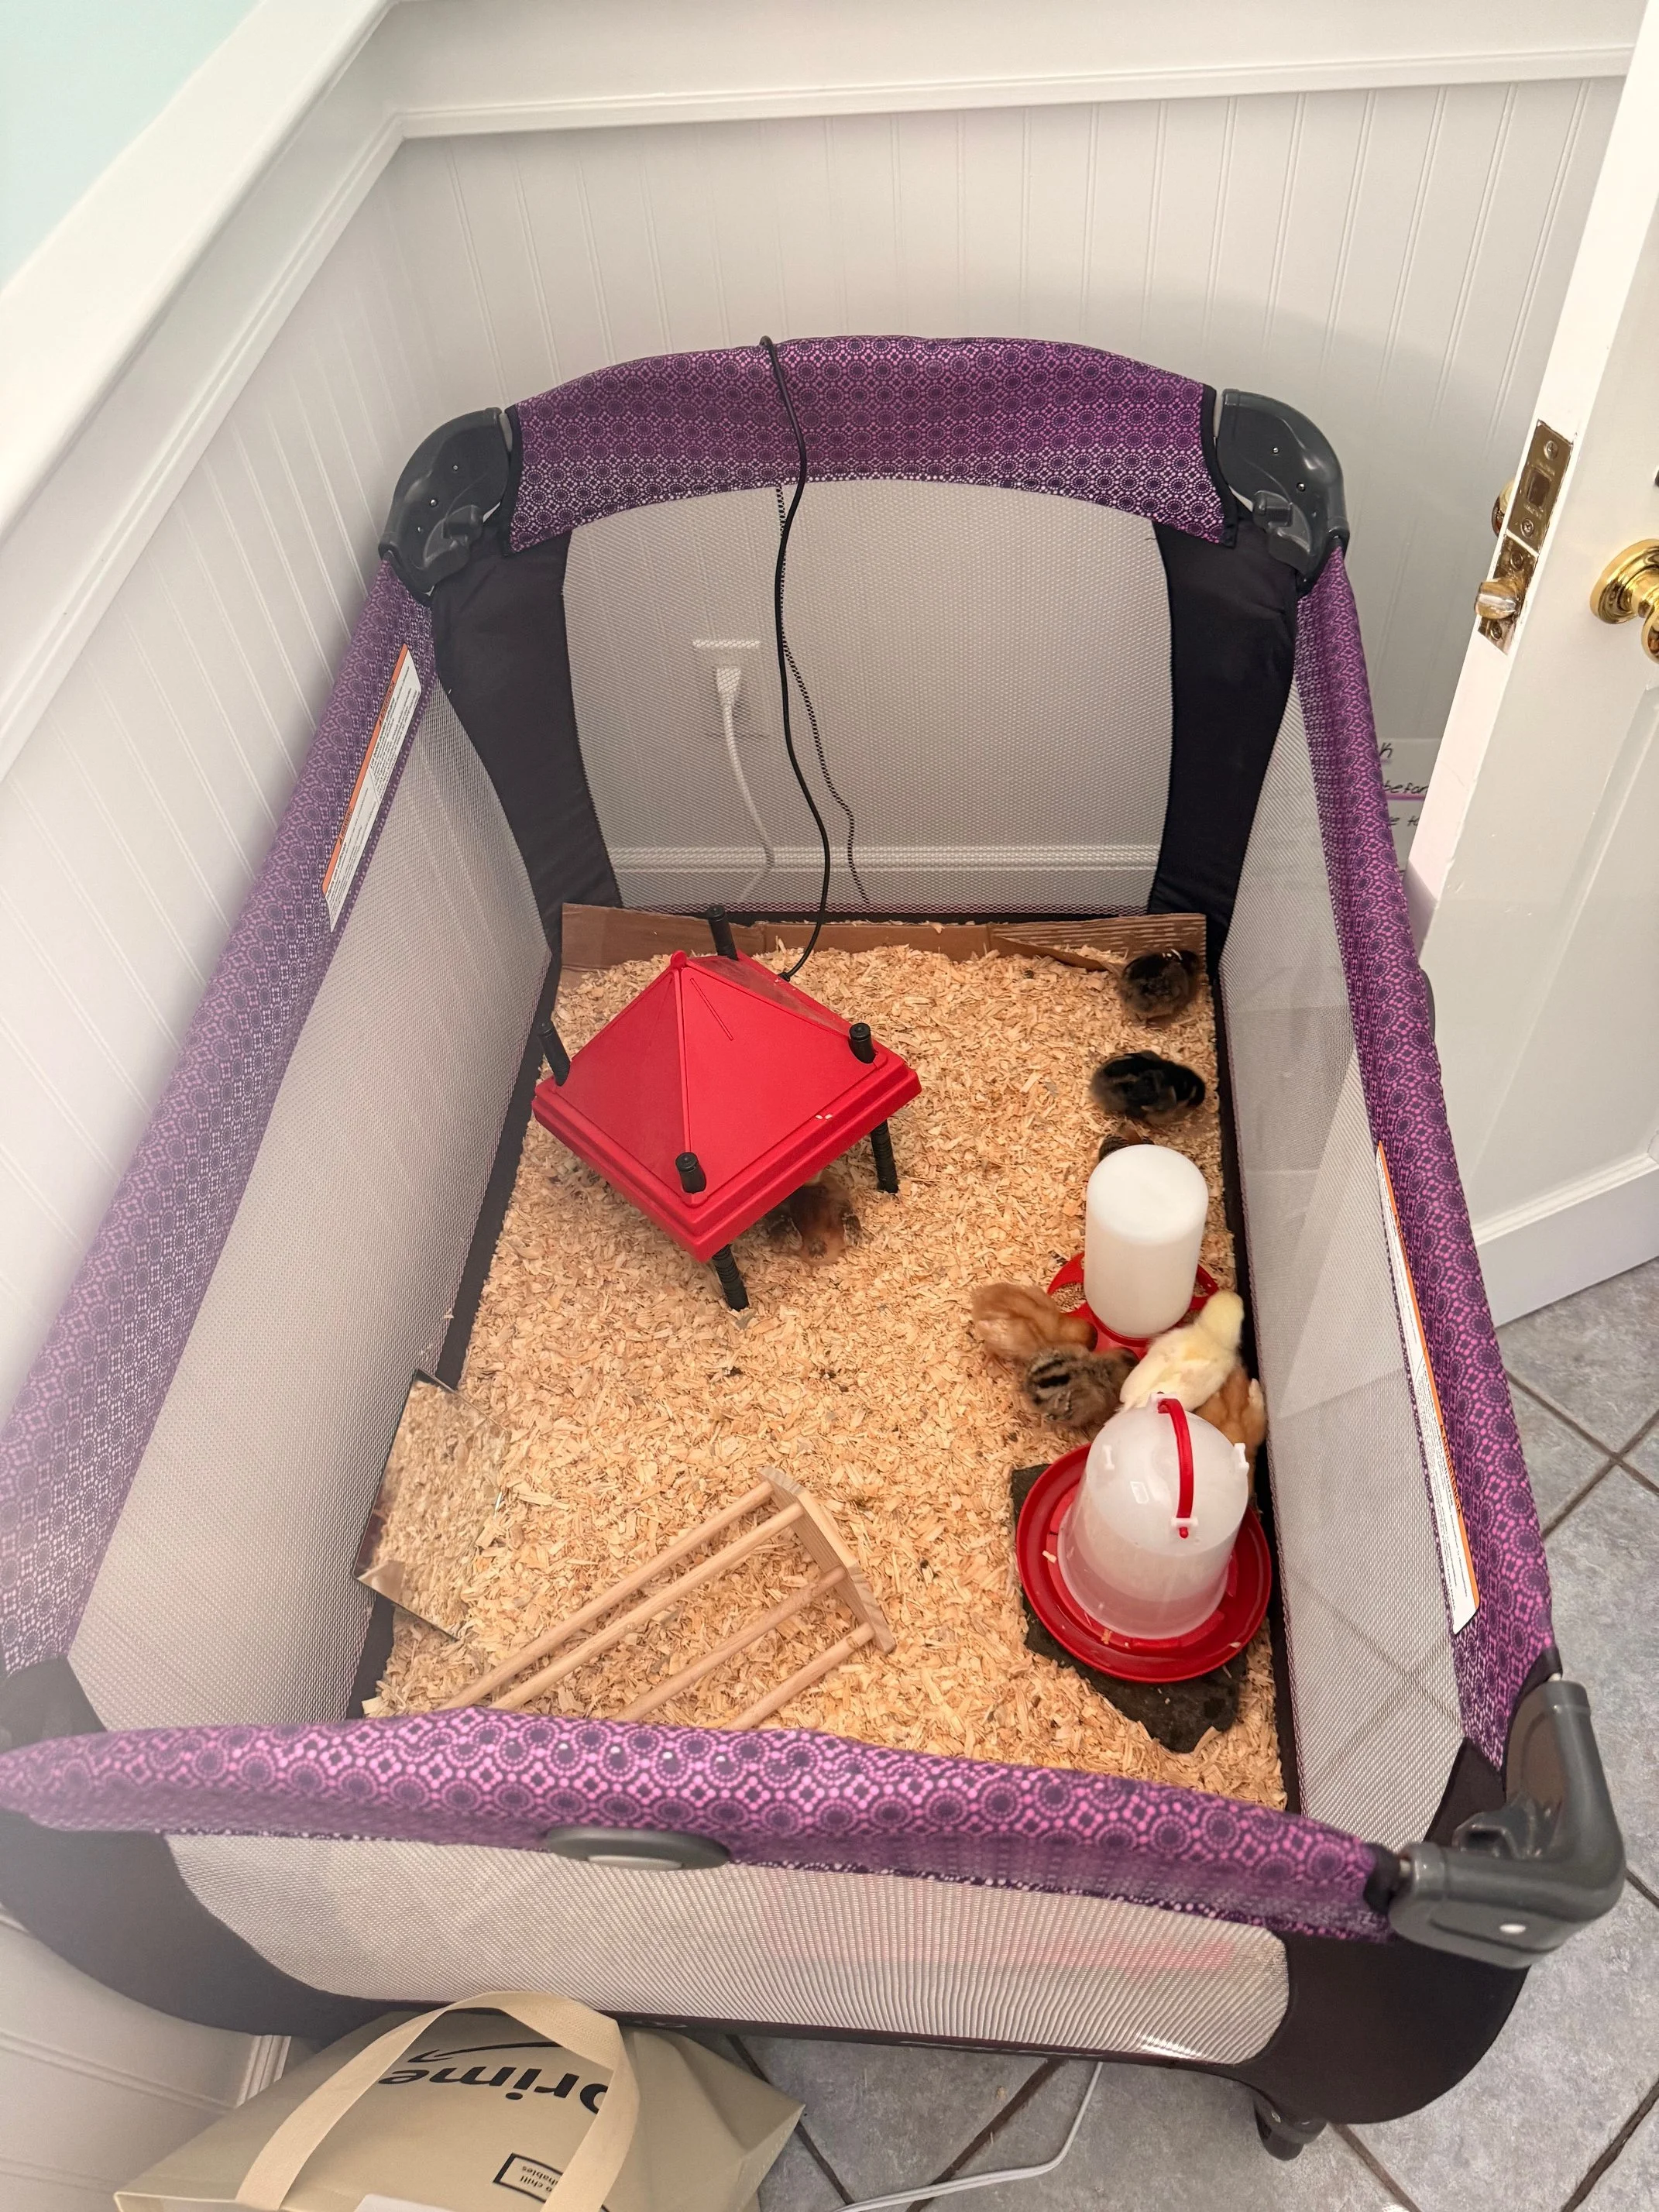
Better view of the Pack N’ Play Chick Brooder

Chicks in the box from Meyer Hatchery.
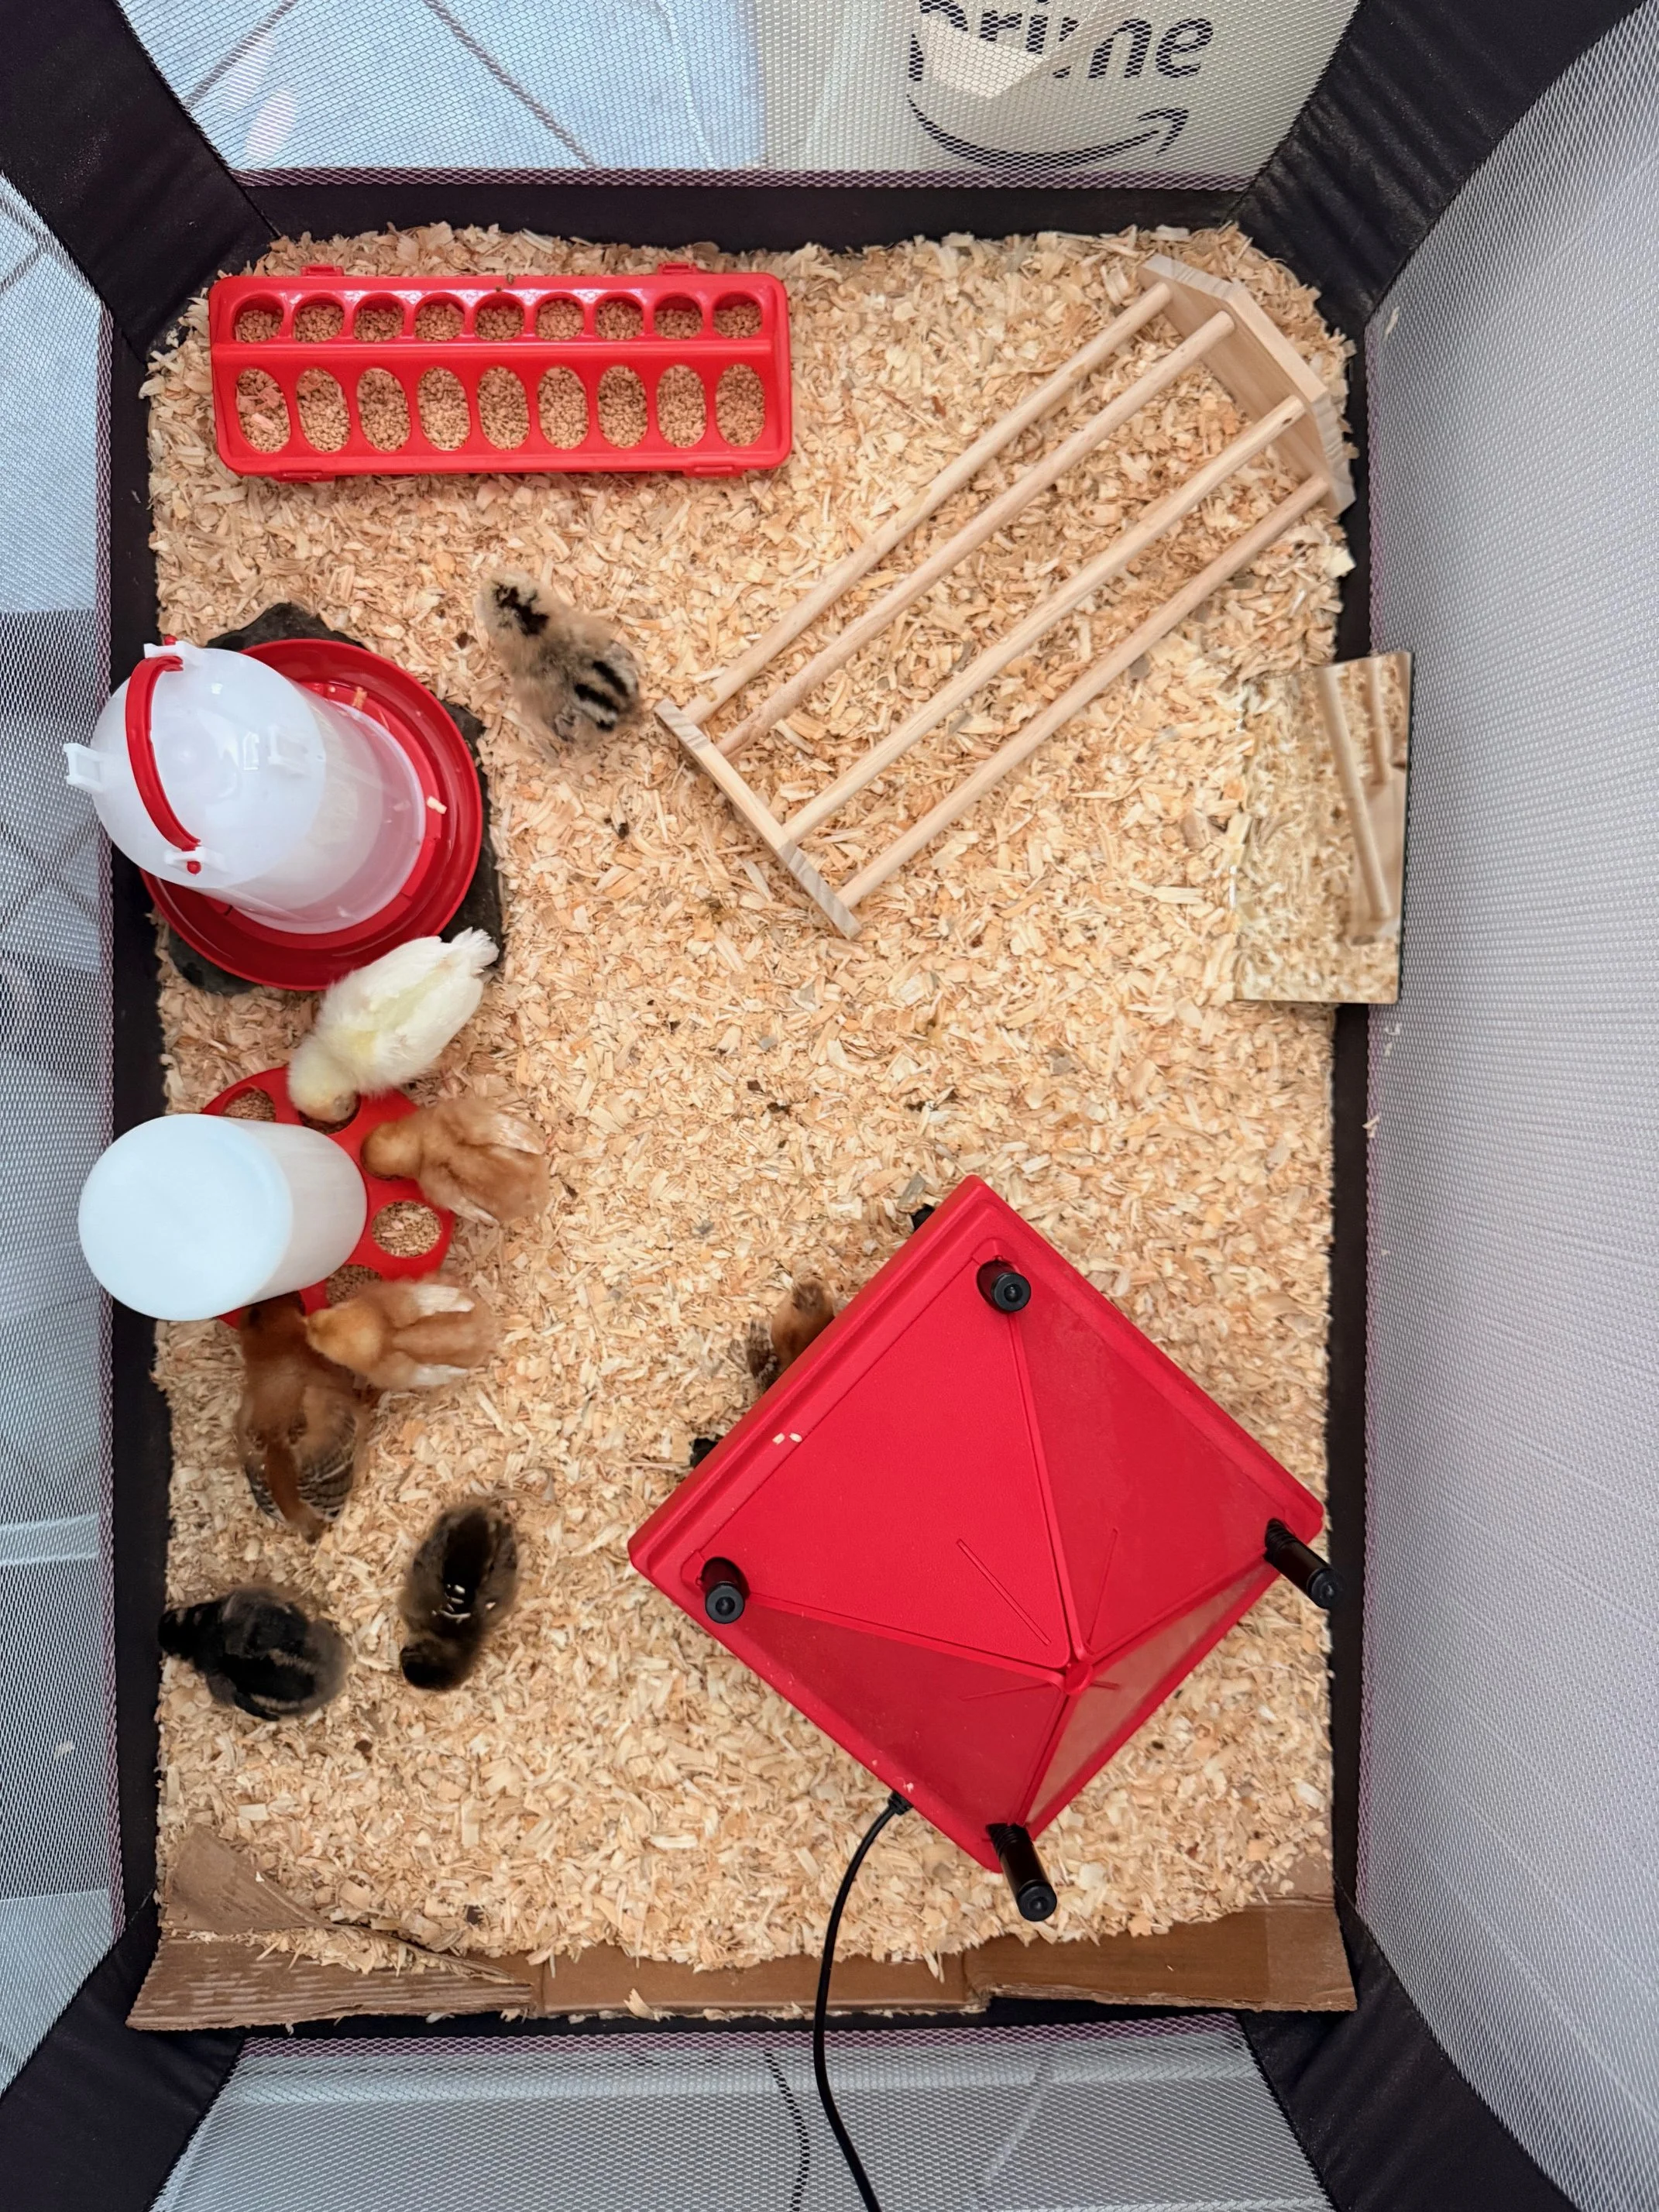
Chicks in their pack n’ play brooder.